Steg for steg lykt / Lantern with tutorial :)
Jeg har tatt bilder underveis når jeg lagde lykt denne gangen,og her kommer en liten forklaring :)
***********************
I have taken some pics when i made this lantern,so here is a little tutorial :)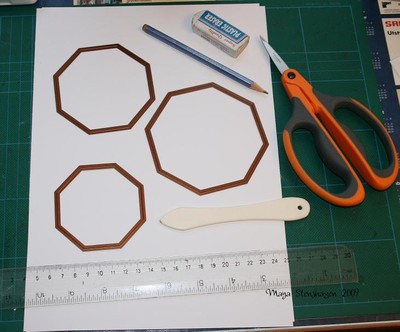
Her er det jeg har brukt.
Men lykten kan lages rund,firkantet eller hvorfor ikke hjerteformet?!
Jeg kommer til å kalle oktagonene for small,medium og large i kommentarene ;)
**********************
Here is what i have used.
But you can make the lantern round,square or why not make a heart shaped one?!
I am gonna call the octagones for small,medium and large in my comments ;)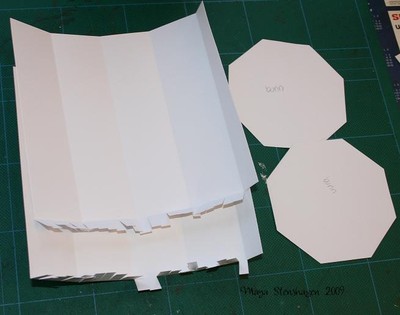
Du trenger to large stanset ut til bunn.
Panelene er kuttet til i to omganer (ettersom papiret ikke er langt nok!)
Mine er 16,5 cm høye med 1,5 cm av de som limkant.
Det er da plass til 4 stk folder på hver,med en ekstra limkant.
(Disse har jeg ikke skrevet opp målene på,ettersom det kommer helt ann på om du bruker spellbinders,eller tegner din egen oktagon ;) )
******************************
You ned to cut out two large for the bottom.
The walls are also made two of,beacuse the cartong isn`t long enough to fit all around the lantern.
My walls are 16,5 cm high,of this is 1,5 cm glue-edge.
Then it holds 4 of the folds on each wall,with an extra glue-edge on them to.
(I haven`t written down the measures of the folds,because you have to use the octagon to make the measure ;) )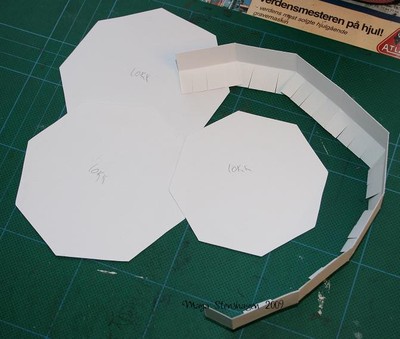
Til lokket trenger du
2* large som du har skjært ut i ytterkant!
(Du bruker da oktagonen som mal,og skjærer etter ytterkanten ;) )
og 1 medium stanset ut.
Papirstrimlen er på 3,5 cm hvorav 1,5 av disse er limkant.
Denne limes på medium!
Og deretter limer du isammen de to Large,og deretter limes medium med kant oppå dem igjen :)
*****************************
For the lid you need
2* large wich you have cut out on the outer edge (use the octagon as a template and draw on the outher edge ;) )
And you need 1 medium cut out.
The paper-stripe is 3,5 cm high and 1,5 of that is glue-edge.
This one glues on the medium!
And then you glue the two large together,and then you glue the medium on top of that :)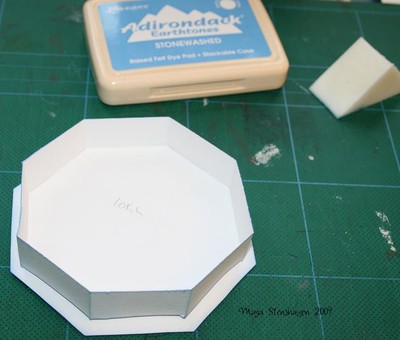
Da vil det se slik ut :)
**************
Then it should look like this :)
Toppen er laget av disse delene.
En small stanset ut.
Papirstrimmelen er 4,5 cm bred og av disse er 1,5 cm linmkant.
Toppen er laget av en halv-sirkel,og igjen må du måle kantene på din egen oktagon ;)
Lim sammen small og papirstrimlene.
********************************
The top of the lid is made by this parts.
One small cut out, and a papeer-stripe on 4,5 cm and of this it is 1,5 cm glue-edge.
The cone-top is made from a half-cirkle and again you have to measure you`re edges on you`re octagon ;)
Glue the small with the paper-stripe.
Da sitter du med tre deler :)
*************
Then you have three parts :)
Så lager du hull i midten på disse,og setter de sammen som bildet viser :)
Pass på att du gjemmer igjen lang nok på begge sider!
Innsiden skal inneholde ett kort,og toppen kan du pynte med metall charms f.eks :)
***********************
Then you make holes in the middle of these two,and attache them as the pic show :)
Make sure you have enough ribbon on each side,on the inside you have a card hanging down and on the top you can decorate with charms :)
Så setter du på toppen,og limer alt sammen :)
Da er lokket ditt ferdig!
**********************
Then you attache the cone on top,and glue it all together :)
And then you have finished the lid!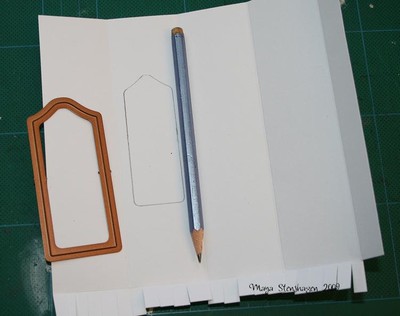
For vinduer,har jeg brukt en tag.
Tegner rundt denne og skjærer ut.
******************
For the windows i have used one tag.
Draw around it and cut out.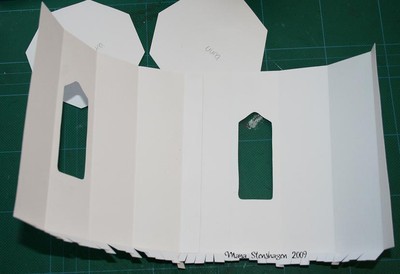
Så festes de to panelen sammen,og du er klar for å pynte dem!
***********************
Then you glue the two walls together,and you are ready to decorate them!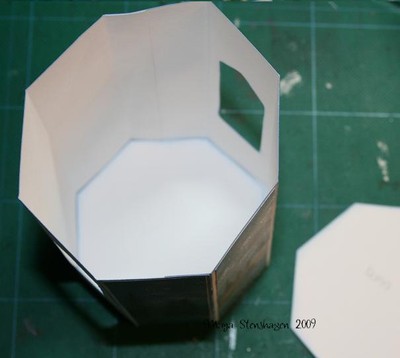
Når du er ferdig med å dekorere,fester du panelet isammen med ene bunnen.
Og den andre large bruker du til å skjule feste ditt ;)
*******************
When you are finished decorating,you glue them on one of the large.
The second large you use to hide you`re mounting ;)
Lag to hull på hver side,og fest ståltråd eller wire.
Ha på lim,og ha på bånd (det går med litt bånd altså!)
Og du er ferdig med lykten!
********************
Make two holes on each side and attache a wire.
Put on some glue and mount the ribbon (alot of ribbon!)
And you are finished with you`re lantern!
Og slik ble min lykt,med stampscapes motiver :)
*******************
And this is how my lantern looks like,with stampscapes motifs :)

Og her ser dere det første motivet :)
Her har jeg stemplet med en av hyttene,stjerne himmel og ett av de store grantrærne.
Og litt gress i fronten :)
********************
And here you can see the first motif :)
Here i have stamped with one of the cabin-stamps,star heaven and some pine tree stamps.
And some grass in the front :)

Og slik ble det andre motivet :)
Her har jeg brukt måne-stempel,skyer, og ett av tre m/vann stemplene.
*********************
And this is my second motif :)
Here i have used the moon stamp,clouds and one of the trees with water.

Og her ser dere hva som skjuler seg på innsiden :)
*****************
And here you can see what`s hiding on the inside :)

Og fra den andre siden.
**************
And from the other side.

Og sånn ser det ut når lokket er tatt av :)
Med min DT-kollega Åsa`s nydelige snømann!
Teksten finner du også hos InkyWings.
********************
And this is how it looks like when you take of the lid :)
With my DT-colleague Åsa`s beautiful snowman!
The text means merry christmas and you also find it at InkyWings.

Zoomet inn på søtingen :)
Malt med distress ink refiller.
Ha en flott tirsdag!
Klemmer fra Maya :)
***********************
Zoomed in on the cutie :)
Coloured with distress ink refills.
Have a wonderful tuesday!
Hugs from Maya :)
thank you, Maya!
hugs, Alina
Underbart Maya!!!
Super snygg :)
Kram Gurkiss
superbe !!!
can I ask about the sizes of the octagons you have used?
I would love to try this out, but I'm not sure what size the octagons you have used.