Kort med skuffe / Card with a drawer
Men uansett,her kommer en kjapp forklaring på hvordan jeg lager kortet med skuffe :)
*************************
I am repeating myself today ;)
But anyway,here is an explanation on how i make my card with a drawer :)

Start med å kutte kartong i 8*30,5 cm
Lag brettekant ved 8-3-8-3-8
Den lille flappen på 0,5 cm blir limkant!
*********************
Cut out the cardstock in 8*30,5 cm.
Make folds at 8-3-8-3-8
The little flap 0,5 is you`re glue-edge!
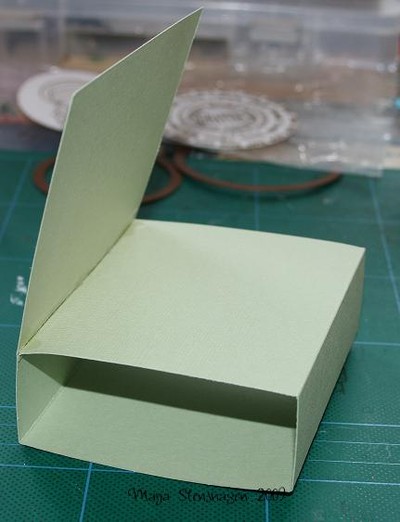
Så har du på ett sterkt lim på den lille kanten,og limer den fast,så kortet/esken blir seende slik ut.
****************************
Use a strong glue on the little flap and glue the card/box togheter so it looks like this.
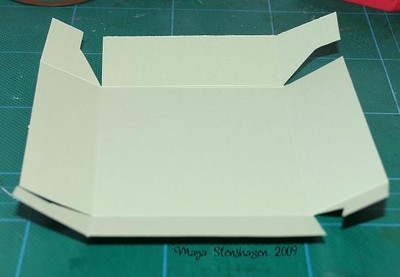
Så var det skuffen :)
Denne lager jeg ca 2mm mindre enn selve kortet.
Kutt ut en kartong på 13,4*13,4 cm
Lag brettekant ved 2,8 på alle sider.
Klipp til hjørnene.
****************************
Then we make the drawer :)
This one i make ca 2mm smaller than the card.
Cut the cardstock 13,4*13,4 cm
Make folds on 2,8 on every side.
Cut the corners.
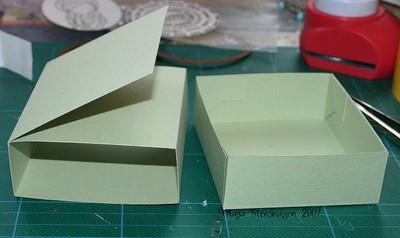
Så er det bare å lime esken sammen.
**********************
Then you have to glue the drawer togheter.
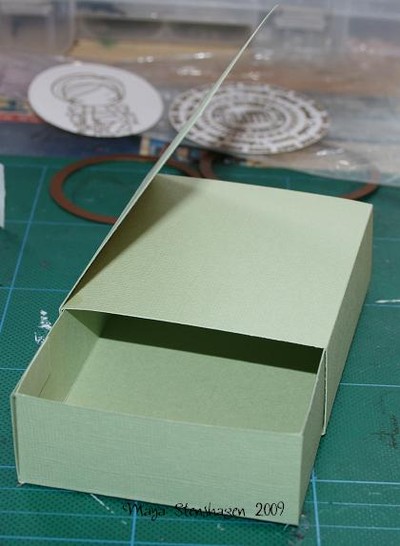
Og så er det bare å se om de passer sammen :)
Og pynte dem!
********************
And then you have to see if they go togheter :)
And decorate them!

Sånn ser den ene esken jeg lagde ut :)
Her har jeg bare dekorert selve esken og skuffen slik de er.
Hjertet er stemplet med distress Aged Mahogany,billetten er fra laserprint ark.
Rosene har fått litt stickles glitter lim på :)
***********************************
This is how one of the cards/boxes i made,turned out :)
Here i have decorated the card only with some design paper.
The heart is stamped with distress Aged Mahogany,the ticket is from a cut out.
The roses has some glitterglue on :)
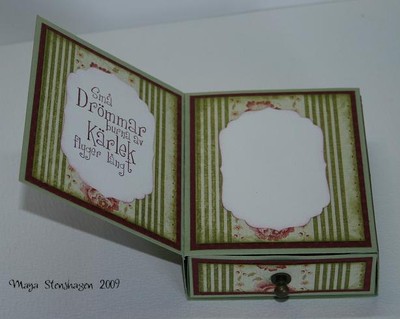
Innsiden av kortet :) Teksten her er bare så nyydelig synes jeg!
*************************
Inside the card :) The text means; "Little dreams borne out of love flies far" (Directly translated...)
Beautiful text i think!

Og innsiden av skuffen,ble slik :)
****************************
And inside the drawer it looks like this :)

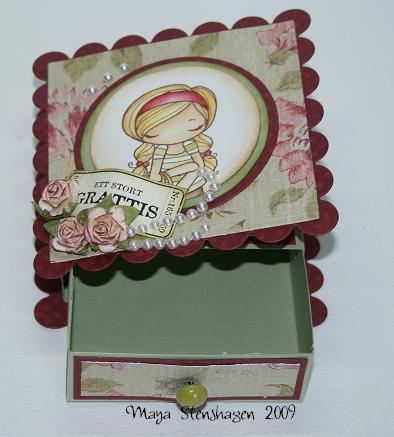
Kort/eske nr 2 ble litt annerledes :)
Her har jeg brukt en spellbinder dies til å kutte ut kartong som igjen er limt oppå esken og under den :)
Ellers har jeg igjen brukt roser og billetter.
Perlene er selvheftende på rad.
************************
Card/box nr 2 is a little bit different :)
Here i have used a spellbinder dies to cut out a cardstock and attaced it on the top and bottom of the box :)
And again i have used roses and tickets.
And some halfpearls.

Jenta er ifra Greeting farm og malt med distress ink refiller.
Rødfargen er en blanding mellom aged mahogany og vintage photo.
Håret er malt med scattered straw og tea dye.
Ansiktet med tea dye og litt tattered rose i kinnene.
****************************
The girl is from Greeting farm and is coloured with distress ink refills.
The red coloure is a mix of aged mahogany and vintage photo.
Her hair is scattered straw and tea dye.
The face is tea dye and a bit of tattered rose on her cheeks.

Innsiden av kortet ser slik ut :)
**************
Inside the card it looks like this :)
Og slik ser skuffen ut på innsiden :)
Håper du fikk litt inspirasjon til å prøve selv!?!
Og skulle det være noe som er uklart,så er det bare å legge igjen en kommentar,så skal jeg prøve å forklare :)
Ha en flott og kreativ dag,
klemmer fra Maya :)
*******************************
And this is the drawer on the inside :)
I hope i could give you a little inspiration to try this you`re self!?!
And if there is anything you are wondering about,just leave a comment i will try to explaine :)
Have a wonderful and creative day,
hugs from Maya :)
Helt fantastiskt fint - och en sååå bra idé! Det ska jag definitivt testa! :D
Jaaaa- fick massor av inspiration!
Tusen tack för det!! :-)
Å så fint Maya! Detta måste jag prova!!
Kram Åsa
Great tutorial Maya. I am going to have to gice this one a go. Thank you hun x
Tack för denna idé, måste prova!
Vilka underbara små askar! Måste bara prova att göra en. TACK för idén och beskrivningen! :-)
//Susanne
I love this card with box!! So cute but I can not figure out the measurements!! Is there anyway you could e-mail me them in inches???? Thank you.
kathy.jackson25@comcast.net
Lovely little box! You did a great job & it would make a perfect gift for a friend. Blessings on your day... Peggy in Texas
Love this box. I can't figure out the measurements either. Please email them to me @ ekg298@frontiernet.net. Thanks
Love it, love it, love it. One question-what did you use for your drawer pull. One of them looks like a bead, but what was the thing you used to connect to the drawer? jdgilch@msn.com
thank you in advance for your thoughtfulness in answering my questions!!!
Love your box/card we are making a lot for christmas.
Thank you.
Tjusigt!
Måste prova göra en sån =)
Tack för tutorialen!
tusen takk for oppskriften!:)
Hi Maya,
This is my first time here, I stumbled upon your blog. LOVE this box with card technique, I tried it and love the way it turned out. Check it out here:
http://bubblegumandducttape.blogspot.com/2010/11/gift-box-card.html
